You can make circuit boards in many ways. I created my first circuit boards with drawing directly on the board with pcb paint and then etching them on my parents stove. Apparently, your parents dont like it when you handle corrosive liquids as a 10-year old kid, without much protections. But much has happened since then. Nowadays I create all PCB designs on the computer, print on transparencies and etches after that. I will try to describe the whole process that I use here.
- Create the PCB design in the computer. I use FreePCB. Very simple program, and when you learn all F-key command, it’s very fast to work in. I almost exclusively do single-sided PCB for hole mounting components, so I do the routing itself, ie no autoroute on my part.
- When you are satisfied with the board, you export it to CAM files. You do this under File / Export-to-CAM. I choose only the board outline and top copper.
- I use a different program, ViewMate, for the print to the papper. Start ViewMate and select “Import” F2. Ctrl-click both the board outline and top copper files and import them.
- Print on transparencies paper. Enter Scale, By Factor: 1
- You are now ready for the actual etching. But first you need to transfer the image of transparencies paper to the circuit board. You do this with a UV light. I have built my box itself with components from Kjell & Company. Will probably be a bit easier, faster, etc. with a finished box, but this works well for me considering the amounts of cards I create. I usually put the cards into the UV-box for 9 minutes.

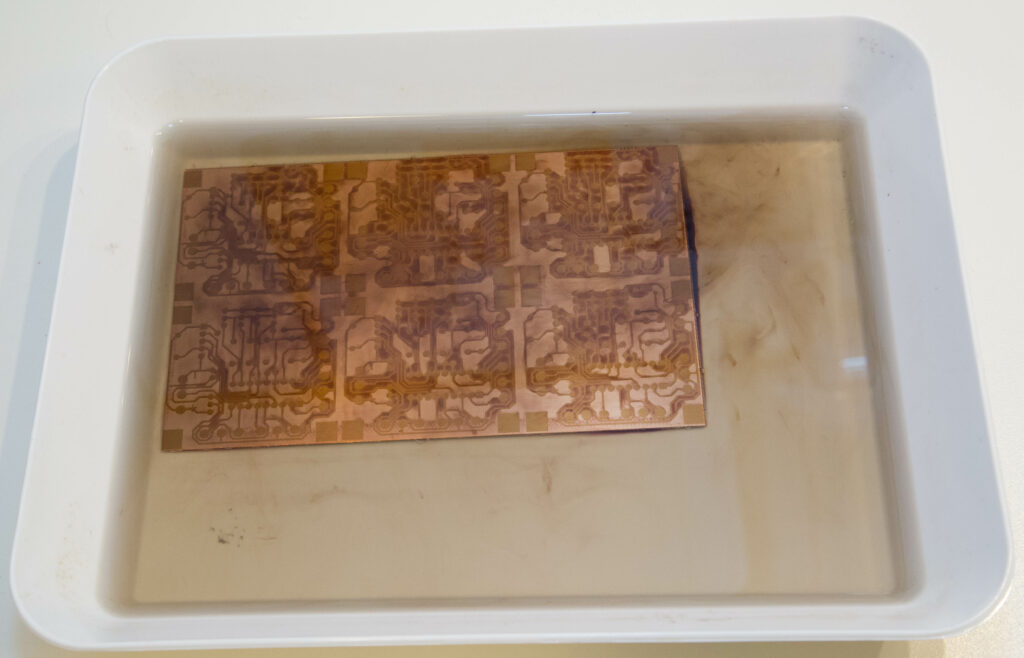
- When the lighting is done, it’s time for the developer. Put the card in a developer bath based on XXXXXXX. Let it lie there and wiggle a bit on the container until the design is clear and apparent.
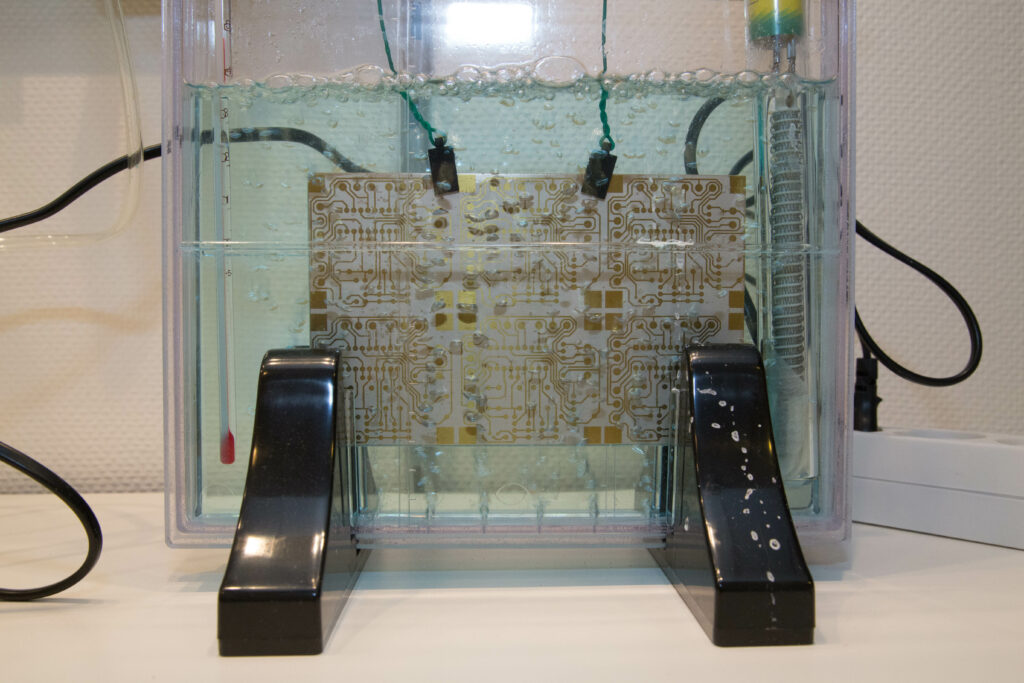
- Etching. That’s where the fun begins. I use a fairly simple etching machine that I bought at Kjell & Company. Mix the etching fluid and lay down the card. After a few minutes, the card should be completed etched and you can now see the finished result. If it was not OK, repeat everything from print and forward.
- Wash the card under water and then clean it with acetone or nail polish remover. I use the nail polish remove quite often to this. Not that it is much better, but it’s usually available at home. However, it might get a little chilly in the evening when the wife realizes that all is used up again.
- Put a protective lacquer on the entire PCB. Use the one that you can solder thru and that is specially created for PCB protection.
- All holes must now be drilled. Just make sure you use the right size of the drill, depening on what component should fit in the hole.
- The card is ready and you can start soldering