Yes, I’m a dad! And I have an obligation towards future generations to keep up the dad jokes. So when I have this opportunity, I just cant miss it.
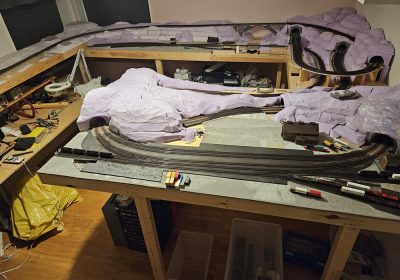
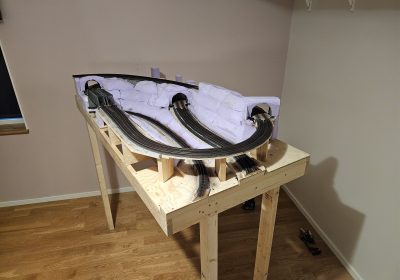
So, it’s been Christmas and New Year’s Eve holiday here. Wonderful time to spend with family and your hobbies. If you have followed my previous blog posts, you know that I got my N scale railroad up and running again. I have obviously spent a lot of time there and having a lot of fun with it. But we have not only run train and working with TrainController to get all up there. I have also started with landscaping. Some places missed the pink styrofoam, so I added that were it was missing. And most importantly, I started with the rocks. I usually place them first before the sawdust+glue combination that will cover the styrofoam.
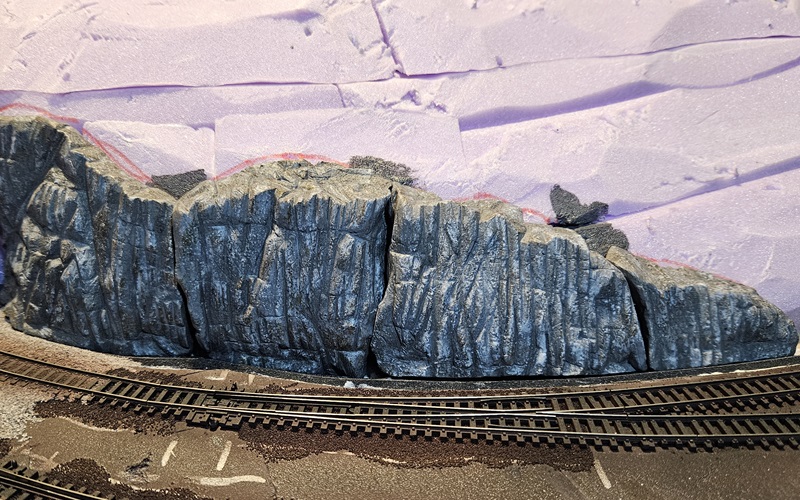
The rocks are created with clay that is formed, cut and painted over and over again to get the result that I’m after. But the process on exactly how I do it is a bit too much to describe here, so I wrote a dedicated post about it. You can find it on Creating rock formations if you are interested. Needles to say, I’m quite happy with the result of the first batch of rocks. I’ve done around 1/3 of the initial chunk of rocks needed, so I guess it’s time to find a good audiobook and start the work on the rest.
New G Scale boiler
Even if I write a lot about N scale on this site, it’s not my primary scale. That is G scale and specifically the live steam versions of it. As of right now, I have two live steam engines. One is Billy from Roundhouse and the first one I bought and built. Billy is fired with gas and only have a 2 channel radio-control. It’s running perfectly and is my go-to engine if I just want a problem free train-running-session. The other one is a coal fired engine with parts from Roundhouse Lady Ann and a coil fired boiler from Riverdale Locomotives. Really fun to run with coal, but it takes a lot more focus from you to make it work good.

At the same time, my son is getting older and is also having a great interest in all kinds of trains. Including running live steam trains. So, my plan has been to design and build my own gas-fired engine that I will use when I run with my son, and he will run my Billy. But as I also bought a 7 ¼” engine, I had to reprioritize what I put my hobby time into. The boiler on my own design is roughly the same size as the one on Lady Ann. I had to shorten it with about 5mm and then it would fit into the smokebox and chassi of Lady Ann. I have carefully removed the coal fired boiler and is now refitting that engine with a gas fired boiler instead, At some point in the future, I will convert my Lady Ann back to coal fired and then have the 3’d one up and running as well with the boiler I’m creating now.
The new boiler is a gas-fired boiler with threaded holes for all the instruments in the driving cab. That includes regulator, water glass, pressure gauge and whistle. Then there are holes for safety valve and manual water filler. In the front, there are two holes, one on each side for water filling from an axle pump and/or servo pump. There is also one hole on the side in the back for the lower part of the water glass.
The boiler is built out of 2mm copper with an outer diameter of 50mm and is 188mm long. It’s designed to run with a working pressure of 65 PSI. During the pressure test, I increased water pressure (not air) to 130 PSI (~9 bar) and kept the pressure there for 20 min while checking for leaks. No leaks found and it hold the pressure. This was my first own boiler, both by design and building. And I’m quite happy that it passed the test and is now a fine and working boiler.